Assign permissions and roles (Optional)
After adding the application to the workspace, you may want to assign permissions and roles for accessing the application. Permissions are set by using the following component in the application HTML:
<ocx-portal-page permission="TEST#SEARCH">
    <!-- Application page content goes here -->
</ocx-portal-page>
If you see the following warning when you enter the page of your application, it means that you need to assign the permissions:
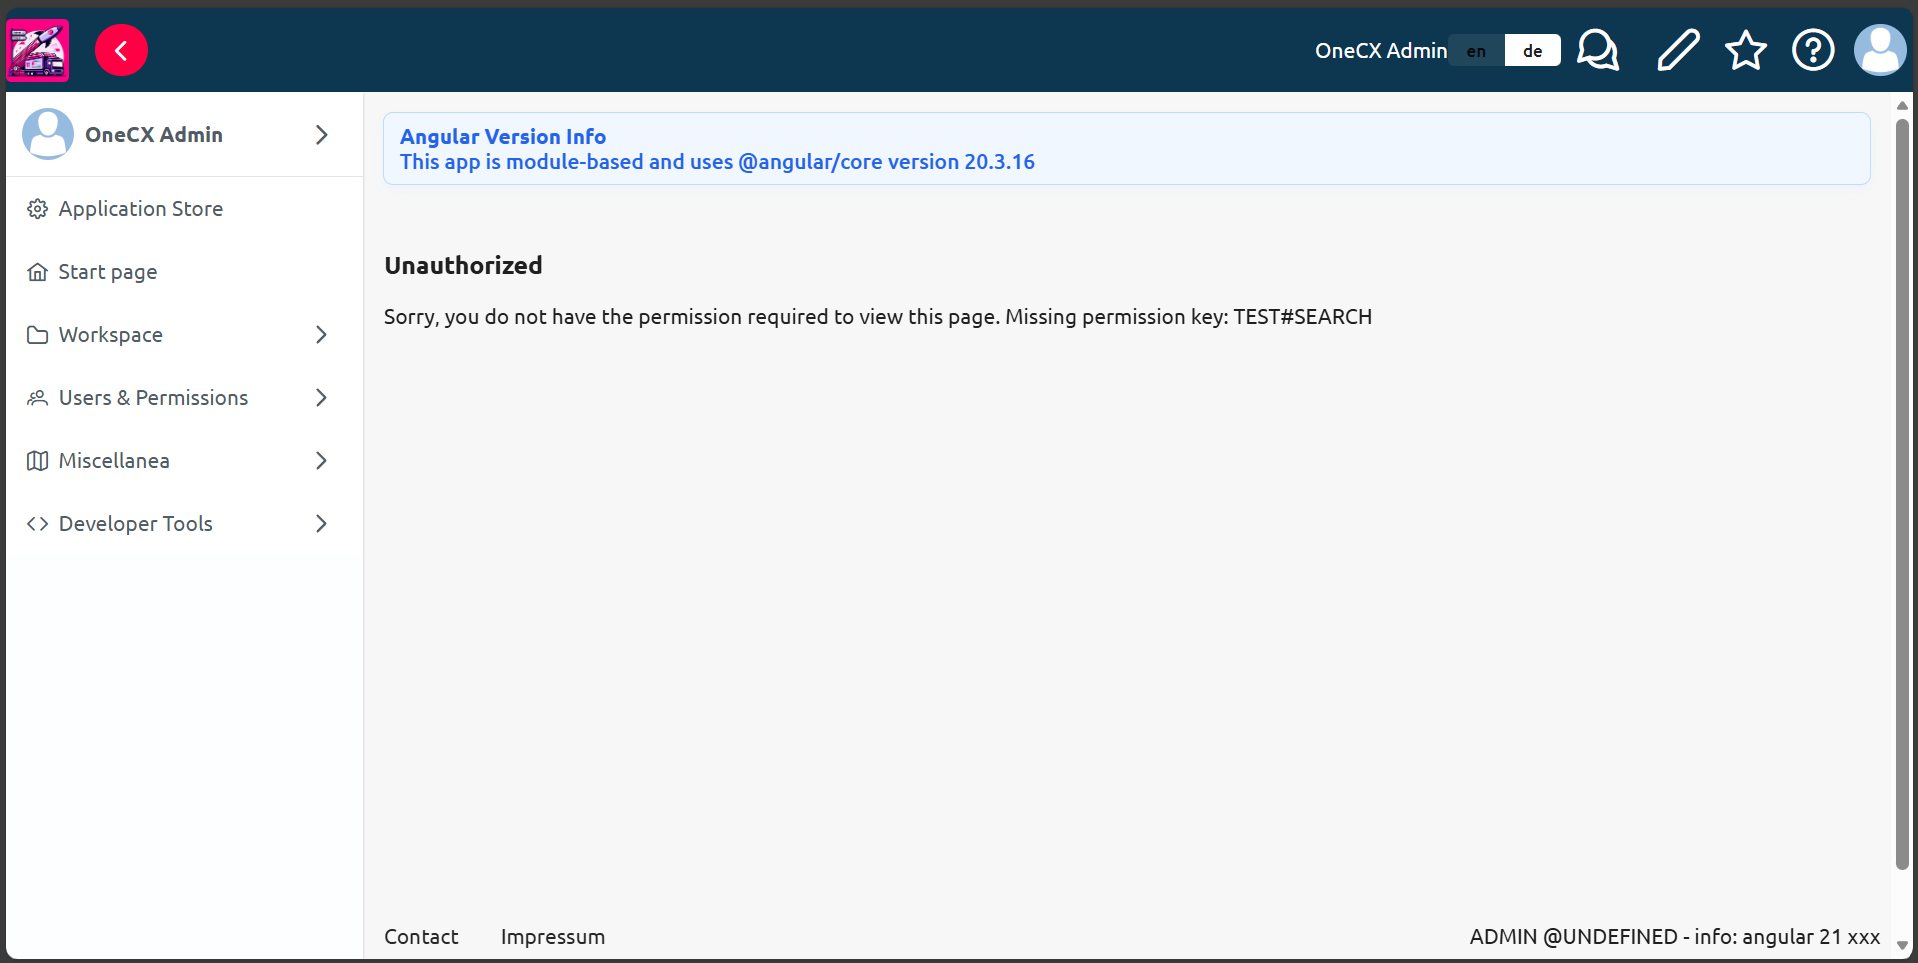
This guide will show how to add TEST#SEARCH permission to the application and assign it to a role. See the Permissions and Roles documentation for details on how the permissions work in OneCX.
Create a permission
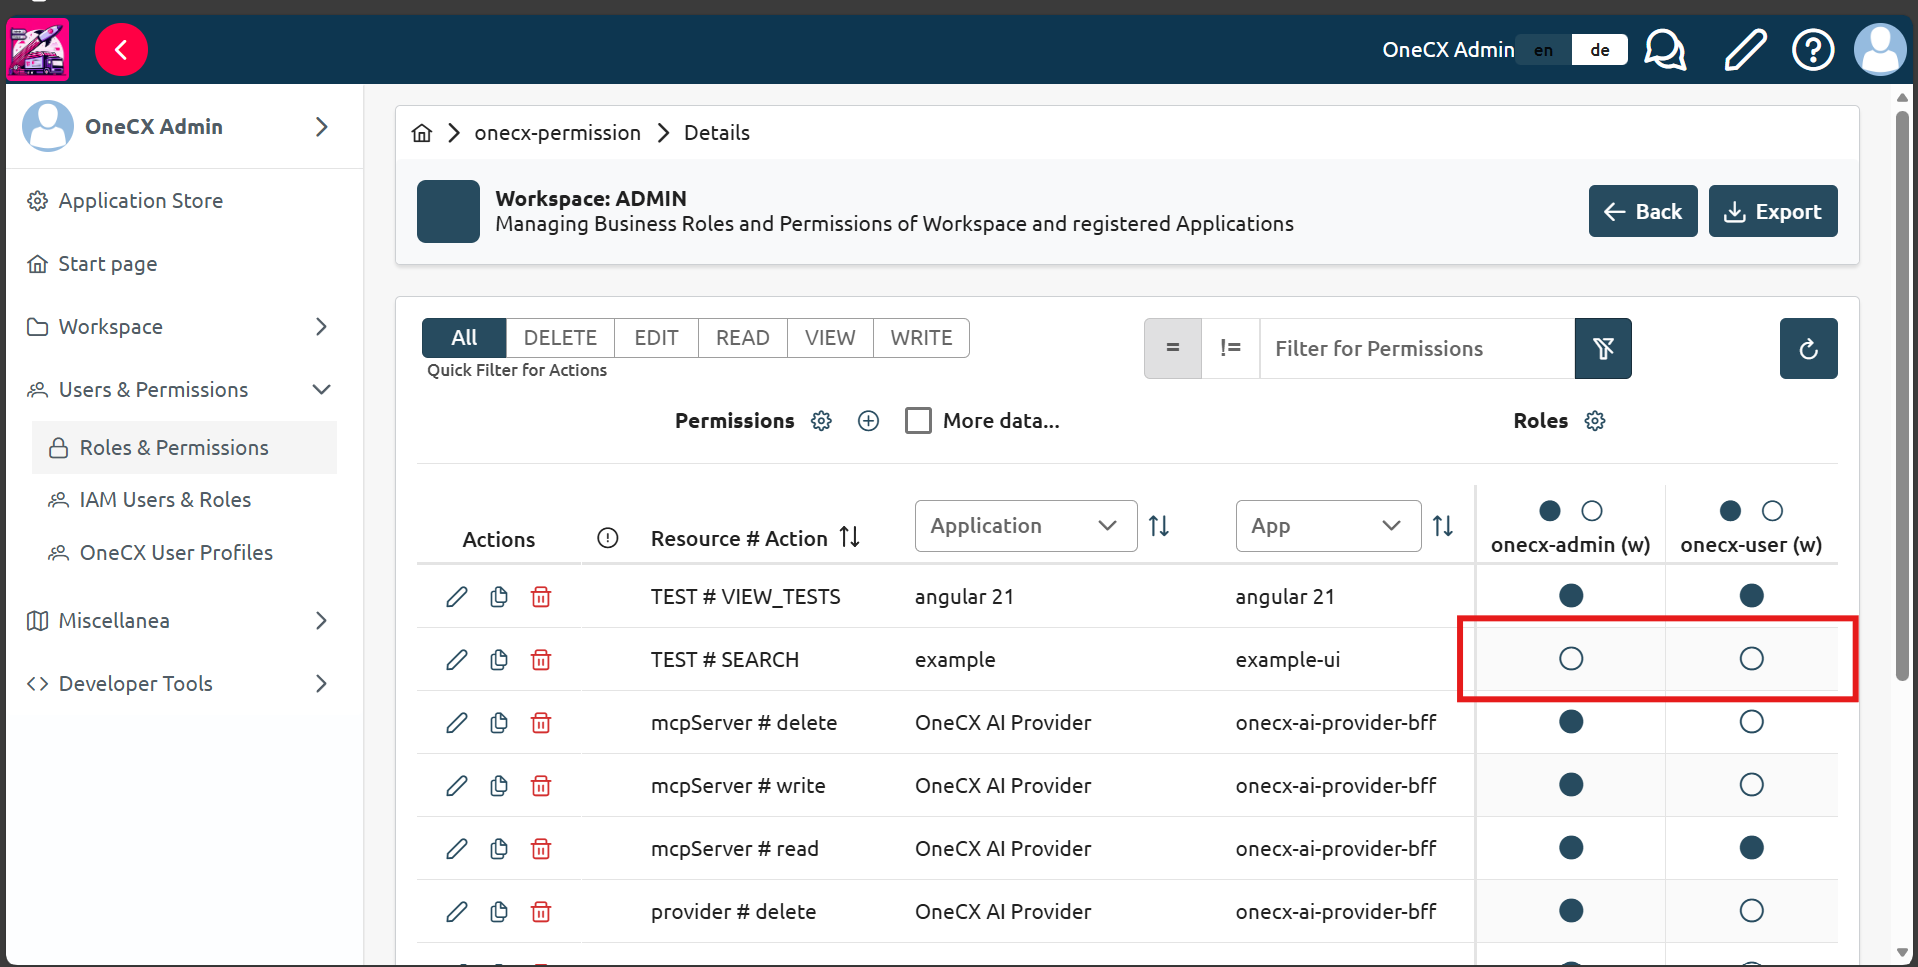
-
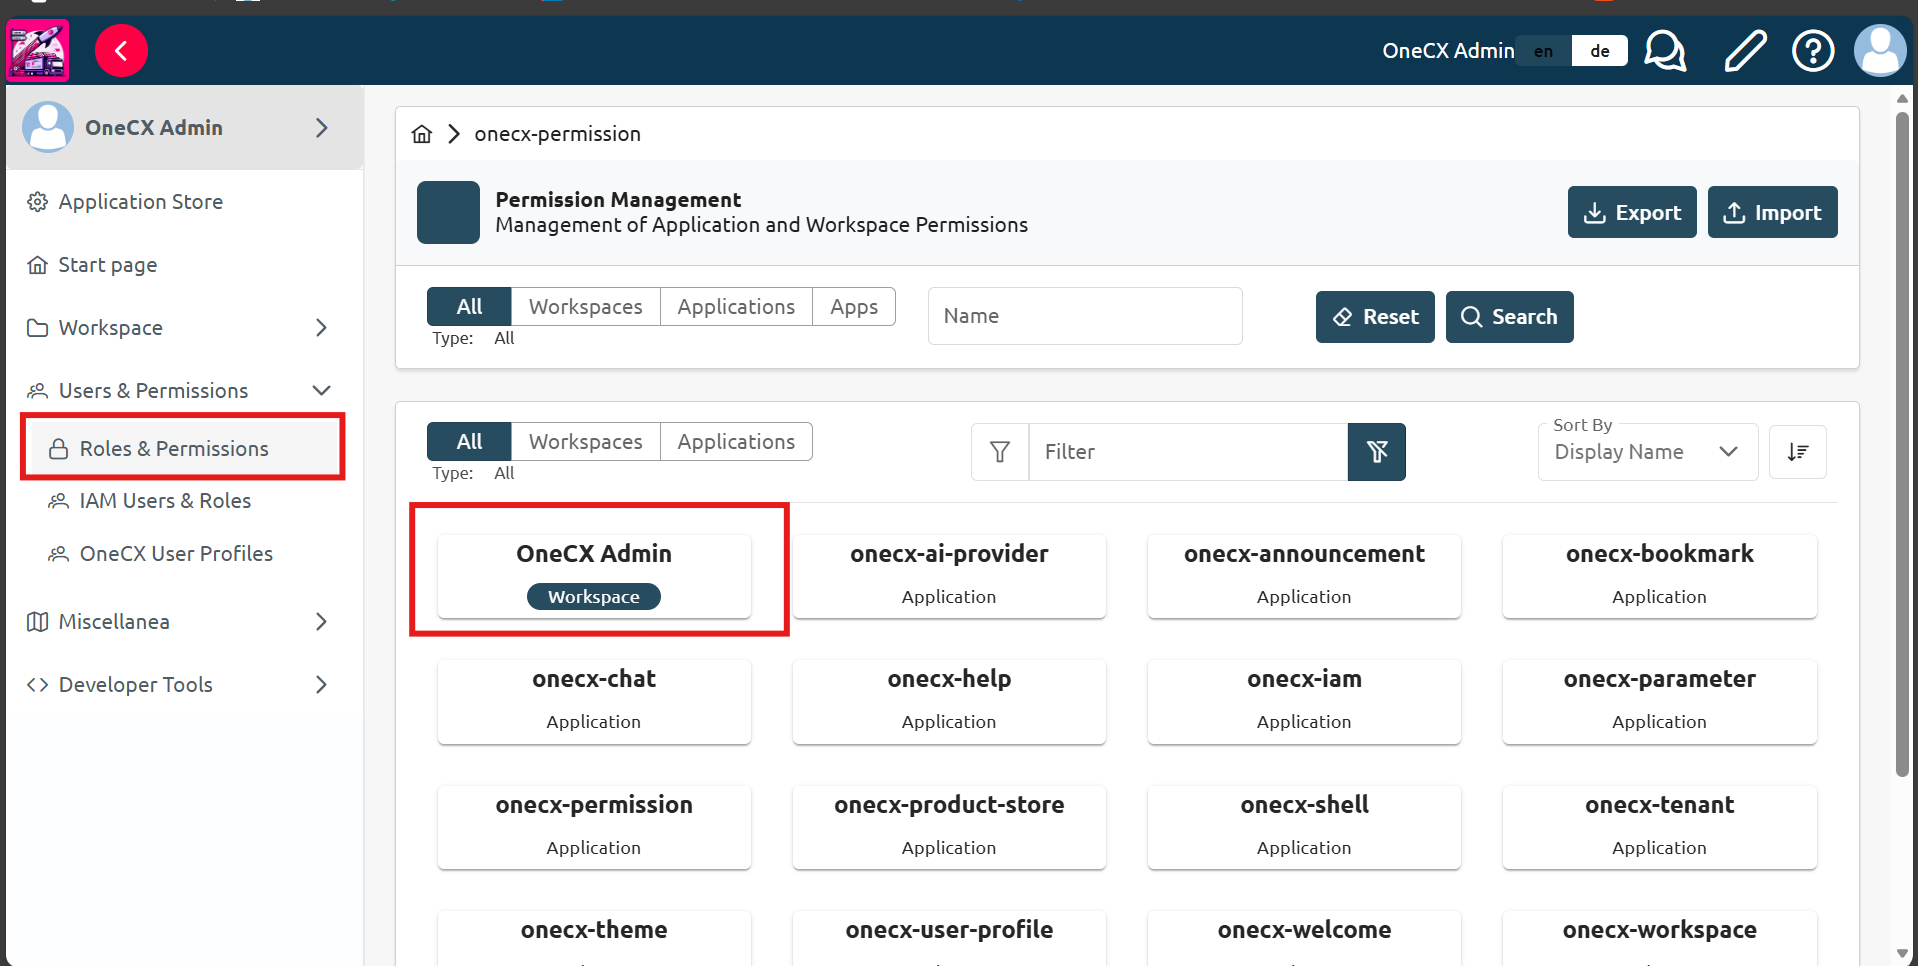
In OneCX, choose
Users and Permissionsfrom the left side panel, then chooseRoles and Permissionssubitem. -
Find the required workspace (e.g.
Onecx Admin) and click on it. (This can also be done for applications)
|
If the permissions page doesnt load make sure you have started the onecx local environment with all services by running See Start OneCX Local Environment for more details. |
-
Click
settingsicon, next toPermissionstitle.
-
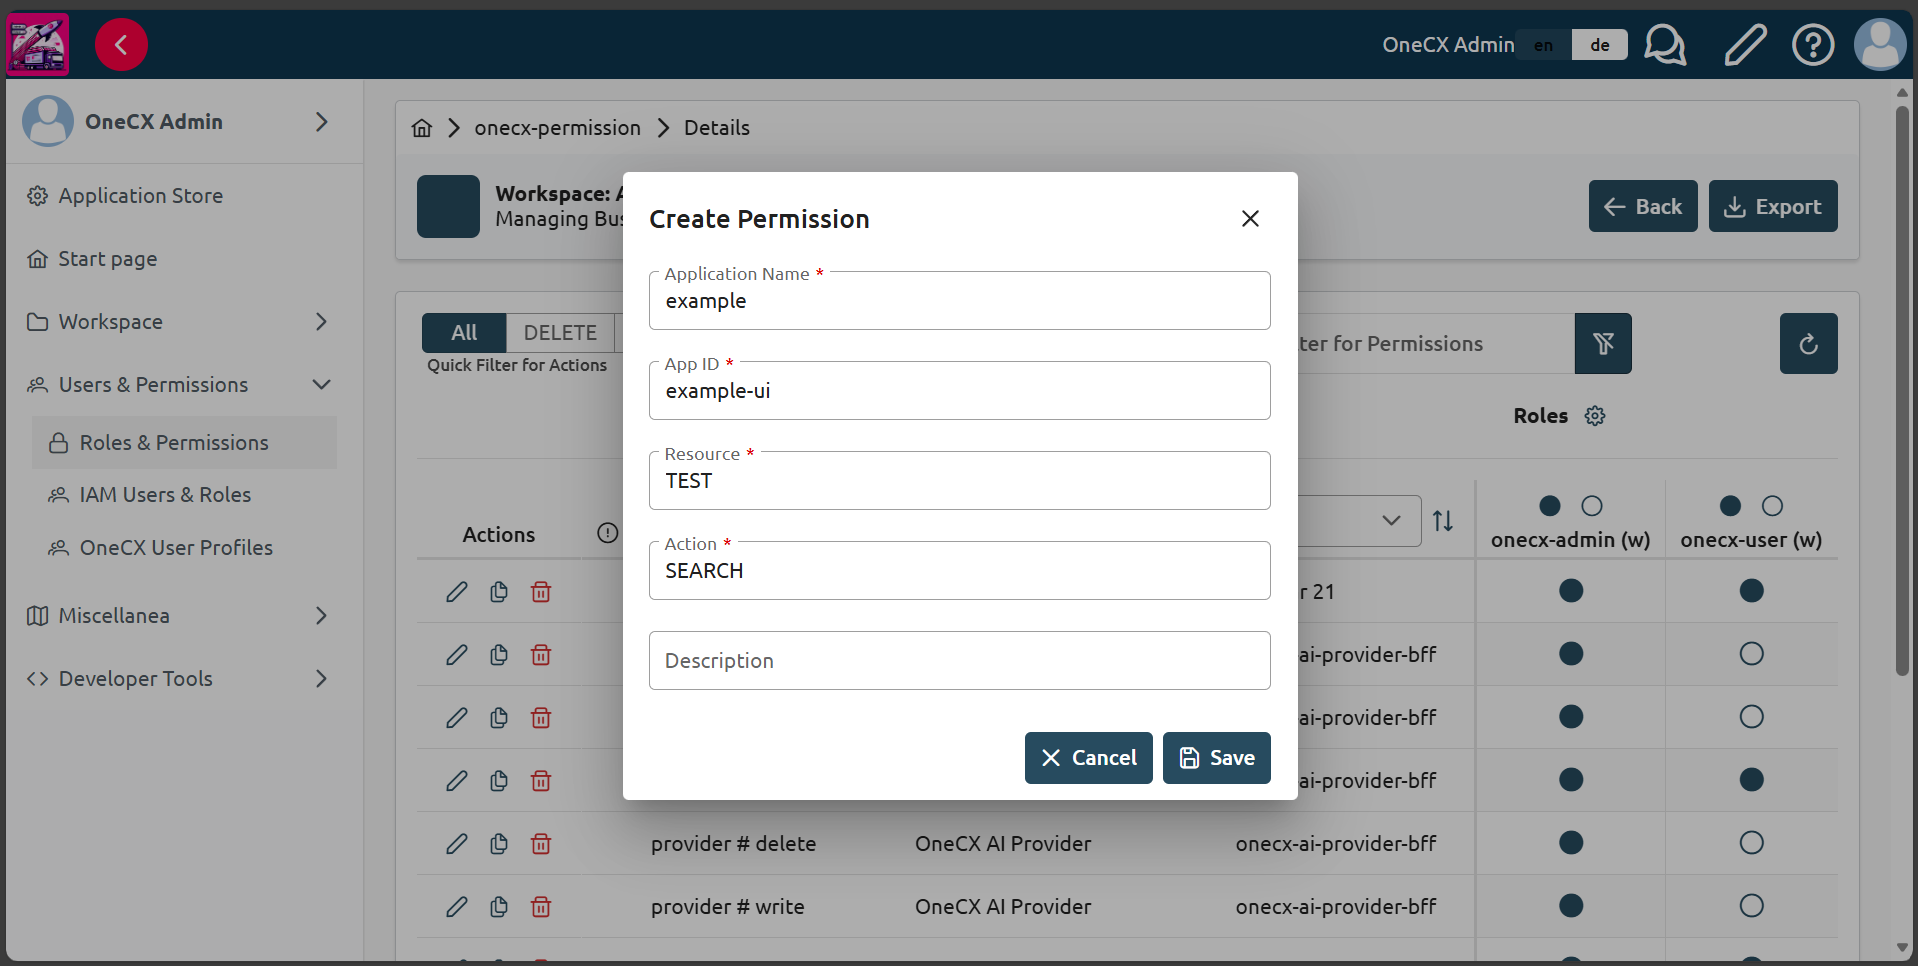
Click
+icon, next toPermissionstitle, to create a new permission.
-
Fill in the form with the following details:
| Field | Example Value | Notes |
|---|---|---|
Application Name |
example |
Name of the application in |
App ID |
example-ui |
Application module name defined in the webpack module federation configuration |
Resource |
TEST |
Unique name of the resource that comes before the |
Action |
SEARCH |
Unique name of the action that comes after the |
-
Click
Saveto create the permission.